At the Distributed SQL Summit in Salt Lake City on November 9, Hari Krishna (Principal Engineer) and Nasi Chaudhari (Developer Engagement) led the morning workshop, “Hands-On Lab From Zero to ADLC: Set Up Your Agentic Dev Lifecycle with Meko in One Session.” They showed how agents can pass decisions and constraints from planning to coding, review, and testing. The part I wanted to try back at my Mac was running Meko itself locally.
Why run Meko locally?
Say you’re building a small app and you want your coding agent to follow a decision you made yesterday. Maybe you agreed that every migration needs a rollback check before it can ship. You could repeat that instruction in each session, or put it in a datapack, Meko’s container for project context, and let the next session look it up.
A local install gives you a sandbox for trying that workflow. You can index a test runbook, see what a search returns, and connect an agent when you’re ready. The server and its data live on your computer, and you can do the entire CLI demo without a Meko Cloud account. If you connect an agent that uses a hosted model, the context it retrieves can still be sent to that model as part of a request. Meko quick start · Local server reference
Install Meko on macOS or Linux
I’m using a Mac for this walkthrough. The same installer works on 64-bit Linux (x86-64 or ARM64), including VMs. On macOS, you’ll need Apple Silicon and macOS 14 or later. Run the installer in your Mac’s Terminal or from an SSH session on the VM:
curl -fsSL https://mekodata.ai/install.sh | sh
The installer downloads and starts the server and makes both meko and meko-cli available in ~/.local/bin. On my Mac, Meko reported that the context engine was ready before showing Choose your agentic experience.
kode and press Enter. That’s the option Hari and Nasi had us choose for agent-assisted development work such as code reviews, pull requests, and refactoring. If you selected skip for now, you can add Kode later with meko extension install kode. Meko command referenceWhat happens after you choose Kode?
On my Mac, the installer had already started Meko 1.20261109.2 before it showed the menu. Selecting kode downloaded Kode 1.20261109.4 and opened a second setup flow. Here’s what that looked like on a Mac that didn’t already have a supported coding agent installed:
- 1. Choose a coding agent. Kode offered Claude Code, OpenCode, or Kiro CLI. I chose 1 for Claude Code, then answered Y when Kode showed the install command and asked to run it. On my Mac, it installed
claudein~/.local/bin. - 2. Decide whether to install GitHub CLI. Kode asked if I wanted
ghfor opening pull requests and following reviews. I answered Y, so it ranbrew install gh. Homebrew spent much of that step updating its package lists and cleaning up old files. The lines to look for are Homebrew finishing theghinstall and Kode reporting Installed gh. - 3. Sign in to the tools you chose. Kode prompted me to sign in to Claude Code, opened a browser, and reported a successful login when I returned to Terminal. It then offered to run
gh auth login. I chose GitHub.com, HTTPS for Git operations, and browser authentication. When the CLI prints a one-time device code, press Enter to open GitHub and finish authorizing the CLI in your browser.
If you chose Claude Code and enabled the GitHub integration, you can check both logins before opening Kode using:
					claude auth status --text
gh auth status
meko kode ui
Back at the shell, check the base Meko server. If your shell can’t find meko, open a new Terminal window and run:
meko status
Here’s an excerpt from my Mac after installation:
					  ✓ Context engine  ready
  ✓ Service         launchd
  ✓ Updates         up to date

  ● Meko 1.20261109.2 is running

  Web UI  http://127.0.0.1:7777 · local, from this computer
  Agents  http://127.0.0.1:7777/mcp · MCP
          http://127.0.0.1:7777/api/v1 · REST API
  Cloud   not linked
Once Context engine shows ready, open the web UI. The launchd line is from macOS, and Cloud not linked is the state I used for this local walkthrough. To check Kode itself, run meko kode status. Meko command reference
I ran meko ui on my Mac and it opened the browser directly at http://127.0.0.1:7777. I could see the LOCAL badge and the default datapack selected. Meko created that datapack on first start. Its Overview showed zero knowledge files and no searches yet, which gives us a baseline before we upload the runbook. Meko on GitHub · Meko Local Web UI
Example:
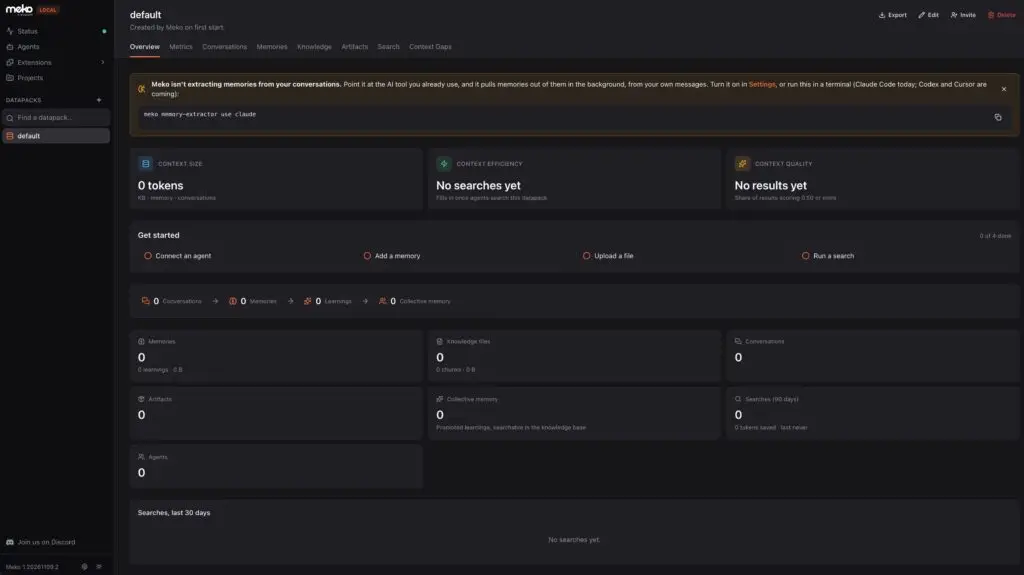
meko memory-extractor use claude command enables a separate workflow that uses Claude Code to extract memories from conversations. Meko Local Web UImeko status --verbose and look for the Data line. The default is ~/.meko, and the status command shows the path your instance actually uses. Meko command referenceGive Meko something only your runbook knows
To see whether Codex can retrieve a rule from Meko, let’s make up one with a name and details an agent is unlikely to guess. Create the Markdown file in a temporary directory outside your coding project, upload it to the default datapack, and search that datapack from the terminal:
					demo_dir="$(mktemp -d)"

cat > "$demo_dir/canyon-gate.md" <<'EOF'
# Canyon Gate release rule

Before opening a migration pull request, replay the migration
against the staging snapshot and attach the rollback log.
The release captain must approve the rollback log before merge.
EOF

meko-cli upload "$demo_dir/canyon-gate.md" --datapack default

meko-cli search "What does the Canyon Gate release rule require?" \
  --datapack default --source knowledge_base --limit 3
The upload waits for indexing. On my Mac, Meko indexed the runbook as one chunk and returned it as the first search result. I’ve shortened the temporary path and omitted the generated IDs below:
					…/canyon-gate.md: indexed, 1 chunk
Knowledge base (relevance):
  1.00  Document: canyon-gate Section: Canyon Gate release rule Before opening a migration pull request, replay the migration a…
The search preview cuts off mid-sentence. For this CLI check, look for Document: canyon-gate and Section: Canyon Gate release rule. In the next step, we’ll check whether Codex can pull the full rule from that source, including who approves the rollback log. Meko CLI reference
Try the handoff in a fresh Codex session
With the CLI search working, let’s see what a fresh coding session can retrieve. For this demo, I’m connecting Codex directly to the local Meko server. The retrieval steps work with the base Meko install, so you can follow along whether you selected Kode or skipped it:
meko agent connect codex
On my Mac, the connection command returned this confirmation:
Connected Codex to Meko
The installer’s Next instructions say to restart any Codex session that was already running so it can pick up Meko’s tools. Exit the old session if you have one open, then start a fresh session from Terminal.
In the new session, ask the following:
- Search the default datapack in Meko for the Canyon Gate release rule. What should I do before opening a migration PR, and who approves the rollback log before merge? Name the source document.
In my fresh Codex session, the tool activity showed meko.conversation_create followed by meko.context_search. Codex then answered:
- Before opening a migration PR, replay the migration against the staging snapshot and attach the rollback log. The release captain must approve the rollback log before merge.
- Source: canyon-gate, section “Canyon Gate release rule,” in Meko’s default datapack.
meko.context_search call and the cited section show where the answer came from, including the approval rule that was beyond the CLI preview.That’s the handoff I wanted to reproduce from the workshop. I put the release rule in Meko once, and a fresh Codex session found it and named its source. Connect a local agent
Final thoughts
At the summit, Hari and Nasi showed how decisions can carry through planning, coding, review, and testing. Back at my Mac, I wanted to see that handoff on a smaller scale. The detail I was watching for was who approves the rollback log. The terminal preview ended before that line, but Codex found the approval rule and pointed me to the section where it was written down.
For a real migration PR, I’d put the team’s migration checklist in the datapack and ask Codex which steps apply to the change I’m reviewing. If it flags a missing rollback log, I can check the cited section and look at what’s attached to the PR. If the checklist calls for a separate approval, I still need to verify that the right person signed off before I approve the change.
Running Meko locally gave me a place to try that workflow with one Markdown file. I can try different review questions against the same runbook and see whether the answers point back to the right sections. By the time I bring it to a team project, I’ll have a better sense of which parts of the checklist Codex can surface reliably and what I still need to check in the PR itself.
Share a datapack with your team so everyone can work from the same runbooks. Chat with the datapack in WorkbenchLM or try different models in Meko Labs.
Have Fun!
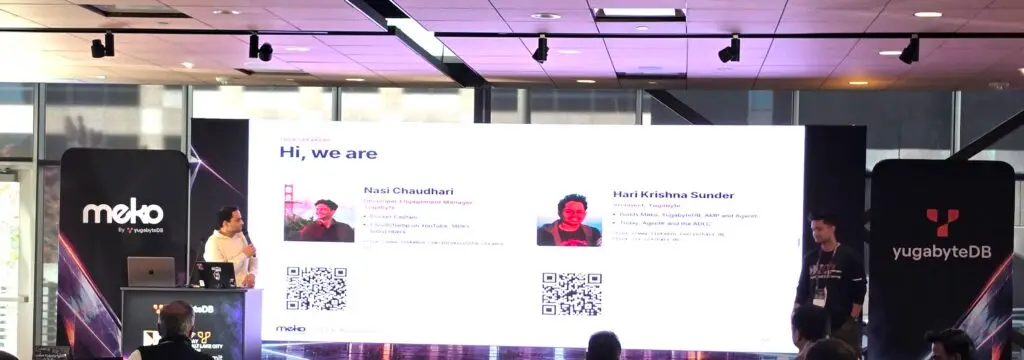
Great job, Hari and Nasi! 👏
Hari Krishna (Principal Engineer) and Nasi Chaudhari (Developer Engagement) kicked off the morning at the Distributed SQL Summit in Salt Lake City on November 9, 2026, with their hands-on workshop, “From Zero to ADLC: Set Up Your Agentic Dev Lifecycle with Meko in One Session.”