Don’t Forget the Control Plane: Encrypting YugabyteDB Anywhere Metadata at Rest

When discussing encryption at rest with YugabyteDB Anywhere, the conversation usually focuses on the YugabyteDB universes managed by YBA.

That makes sense. YugabyteDB has native Encryption at Rest support using envelope encryption and a KMS configuration. YBA can manage keys using AWS KMS, GCP KMS, Azure Key Vault, or HashiCorp Vault.

But there is another database worth thinking about:

  • The PostgreSQL database used internally by YugabyteDB Anywhere itself.

YBA stores important control-plane information such as provider configuration, universes, users, roles, certificates, KMS configuration metadata, tasks, and other information needed to manage the environment. YBA backups contain this control-plane state as well.

That raises an important question:

  • How is the YBA metadata database protected at rest?
💡 Two Different Encryption Layers
YugabyteDB Encryption at Rest protects the data stored in a YugabyteDB universe.
It does not automatically encrypt the PostgreSQL storage used internally by YugabyteDB Anywhere itself.
The YBA control plane therefore needs its own storage-level protection.
🛡️ Do You Need This?
Not every YugabyteDB Anywhere deployment needs an additional encrypted storage layer specifically for the YBA metadata database.
For many environments, the existing security controls around the VM, cloud account, storage platform, and backups may already satisfy the organization’s requirements.
This Tip is most relevant when you want an extra layer of protection for YBA control-plane metadata, or when security and compliance requirements explicitly call for encryption of the underlying storage.

How YBA Stores Its Metadata

When YBA is installed using YBA Installer, PostgreSQL is installed by default along with the other YBA services. YBA Installer can also be configured to use an externally managed PostgreSQL database instead.

For a standard sudo-based installation, the default YBA installation root is:

				
					/opt/yugabyte


and YBA stores its data under:

				
					/opt/yugabyte/data


YugabyteDB also supports placing this data directory on a separate disk mounted directly at /opt/yugabyte/data.

That gives us a convenient place to apply storage encryption.

Why Storage-Level Encryption?

PostgreSQL supports several forms of encryption, including TLS, password hashing, and column-level encryption through pgcrypto.

For protecting the entire PostgreSQL data directory at rest, PostgreSQL documentation specifically describes filesystem-level and block-level encryption and identifies Linux dm-crypt + LUKS as an option.

That approach works well for YBA because PostgreSQL does not need to know that its underlying block device is encrypted.

The storage stack looks something like this:

YugabyteDB Anywhere
↓
YBA PostgreSQL
↓
/opt/yugabyte/data
↓
XFS Filesystem
↓
LUKS Encrypted Device
↓
VM Data Disk

The application and PostgreSQL continue reading and writing normal files.

Encryption and decryption happen underneath the filesystem.

⚠️ What Storage Encryption Protects
Disk or filesystem encryption primarily protects data when the underlying disk is offline, detached, stolen, copied, or otherwise accessed without the encryption key.
Once the encrypted filesystem is unlocked and mounted, the operating system presents an unencrypted view of the files to authorized processes.

PostgreSQL documents this same limitation for filesystem and block-level encryption.

Demo: Install YBA on an Encrypted Data Disk

For this simple demo, assume:

  • ● A VM running AlmaLinux 9
  • ● A fresh secondary disk attached as /dev/sdb
  • ● YBA will be installed using YBA Installer
  • ● The secondary disk will hold /opt/yugabyte/data
  • ● LUKS will encrypt the disk

YugabyteDB Anywhere requires an x86 Linux VM meeting the documented hardware and software prerequisites, and AlmaLinux 9 is supported.

⚠️ Use a New, Empty Disk for This Demo
The following example formats and encrypts /dev/sdb.
Do not run these commands against a disk containing data you need. Verify the device name with lsblk before continuing.

Step 1: Verify the New Disk

Start by displaying the block devices:

				
					lsblk


For example:

				
					NAME   MAJ:MIN RM   SIZE RO TYPE MOUNTPOINTS
sda      8:0    0   100G  0 disk
├─sda1   8:1    0     1G  0 part /boot
└─sda2   8:2    0    99G  0 part /
sdb      8:16   0   250G  0 disk


In this example, /dev/sdb is the new 250 GB data disk.

YugabyteDB recommends at least 200 GB of free space for a dedicated YBA data disk.

Step 2: Install the LUKS Tools

On AlmaLinux 9:

				
					sudo dnf install -y cryptsetup


Step 3: Encrypt the Disk

Initialize the disk as a LUKS device:

				
					sudo cryptsetup luksFormat /dev/sdb


You will be asked to confirm the operation and provide a passphrase.

Now unlock it:

				
					sudo cryptsetup open /dev/sdb yba_data_crypt


A decrypted device mapper entry is created:

				
					/dev/mapper/yba_data_crypt


Step 4: Create the Filesystem

For example, create an XFS filesystem:

				
					sudo mkfs.xfs /dev/mapper/yba_data_crypt


Create the YBA data directory:

				
					sudo mkdir -p /opt/yugabyte/data


Mount the encrypted device:

				
					sudo mount /dev/mapper/yba_data_crypt /opt/yugabyte/data


Now verify it:

				
					findmnt /opt/yugabyte/data


Example:

				
					TARGET              SOURCE                       FSTYPE OPTIONS
/opt/yugabyte/data  /dev/mapper/yba_data_crypt   xfs    rw,relatime


Step 5: Verify LUKS

Check the encrypted device:

				
					sudo cryptsetup status yba_data_crypt


Example:

				
					/dev/mapper/yba_data_crypt is active.
  type:    LUKS2
  device:  /dev/sdb


You can also see the relationship using:

				
					lsblk -f


Conceptually, you should see:

				
					sdb
└─yba_data_crypt  crypto_LUKS / xfs
                  ↓
             /opt/yugabyte/data
				
			
🔎 What Have We Accomplished?
Anything YBA stores under /opt/yugabyte/data will now ultimately be written to an encrypted LUKS block device.
That includes the data used by the PostgreSQL service installed by YBA Installer.

Step 6: Install YugabyteDB Anywhere

With the encrypted data disk mounted at /opt/yugabyte/data, install YBA normally.

Run the preflight check:

				
					sudo ./yba-ctl preflight


Then install YBA:

				
					sudo ./yba-ctl install -l /path/to/license


YugabyteDB specifically documents mounting a new stand-alone data disk at /opt/yugabyte/data before running the YBA installation.

After installation:

				
					sudo yba-ctl status


Example:

				
					Services:
  Systemd service   Port    Running Status
  postgres          5432    Running
  prometheus        9090    Running
  yb-platform       443     Running


The exact versions and paths vary by YBA release.

Step 7: Verify the Storage Path Again

Now that YBA is running:

				
					findmnt /opt/yugabyte/data


and:

				
					sudo cryptsetup status yba_data_crypt


That gives us a simple evidence chain:

YBA PostgreSQL
↓
/opt/yugabyte/data
↓
/dev/mapper/yba_data_crypt
↓
LUKS2
↓
/dev/sdb
💡 Nice Side Benefit of a Dedicated Data Disk
YBA Installer already supports using /opt/yugabyte/data as a stand-alone data disk.
That makes encryption easier to reason about because the YBA data can be isolated from the operating-system/root disk and protected independently.

What About Cloud VMs?

The LUKS demo is useful because it clearly shows where encryption occurs, but on AWS, GCP, or Azure, cloud-native encrypted disks are often the simpler choice.

Platform Typical Approach Where Encryption Happens
AWS Encrypted EBS volume, optionally using a customer-managed KMS key Block-storage layer
GCP Encrypted Persistent Disk, optionally using CMEK Block-storage layer
Azure Encrypted managed disk / customer-managed key configuration Block-storage layer
On-Prem / Linux VM LUKS / dm-crypt encrypted disk or logical volume OS/block-device layer

The objective is the same:

  • Ensure the storage containing the YBA PostgreSQL data is encrypted at rest.

What If YBA Uses an External PostgreSQL Database?

YBA Installer does not require you to use its bundled PostgreSQL installation.

The installer supports a useExisting configuration that points YBA at a separately provisioned and managed PostgreSQL server.

In that case, encrypting /opt/yugabyte/data on the YBA server does not protect the PostgreSQL database.

The responsibility moves to wherever that PostgreSQL database resides.

For example:

YBA VM
PostgreSQL connection
↓
External PostgreSQL
↓
Encrypted PostgreSQL Storage

That could mean:

  • ● Encrypted EBS storage for PostgreSQL on AWS.
  • ● CMEK-backed Persistent Disk on GCP.
  • ● Encrypted managed disks on Azure.
  • ● LUKS on an on-prem PostgreSQL server.
  • ● Encryption provided by a managed PostgreSQL service.
⚠️ Follow the Data
Do not assume that encrypting the YBA VM automatically protects the YBA metadata.
First determine where PostgreSQL is actually storing the metadata, then protect the storage underneath that PostgreSQL instance.

Don’t Modify the YBA PostgreSQL Schema

PostgreSQL includes pgcrypto, and third-party approaches to database-level encryption also exist.

That does not mean adding encryption columns, triggers, or other schema changes to YBA’s internal PostgreSQL database is a good approach.

The YBA metadata schema belongs to the YBA application and evolves as YBA is upgraded.

⚠️ Keep Encryption Below the YBA Schema
Avoid modifying YBA-owned PostgreSQL tables to implement your own column-level encryption.
For transparent protection of YBA metadata at rest, use the storage, filesystem, block-device, cloud-volume, or externally managed PostgreSQL encryption layer instead.

Don’t Forget the Backups!

Encrypting the live PostgreSQL disk is only part of the job.

YBA Installer can create a backup of the YBA installation using:

				
					sudo yba-ctl createBackup /path/to/backup


YugabyteDB documents that these backups contain the state required to recover the YBA installation, including provider configurations, KMS configurations, certificates, users, roles, and other control-plane components.

That means the backup itself deserves protection.

If the resulting .tgz is copied to:

  • ● S3
  • ● Google Cloud Storage
  • ● Azure Blob Storage
  • ● NFS
  • ● Local backup storage

make sure that destination is also encrypted appropriately.

🔐 Think About the Entire Metadata Lifecycle
Encrypting the live YBA disk but leaving YBA metadata backups unencrypted simply moves the exposure somewhere else.
Protect both the live control-plane storage and its backup copies.

YBA Encryption at Rest vs. YBA Metadata Encryption

These two concepts are easy to confuse, so I think this deserves a summary table.

Encryption Protects Typical Mechanism
YugabyteDB Encryption at Rest Data stored inside YugabyteDB universes YugabyteDB envelope encryption + KMS
YBA Metadata Encryption YBA’s PostgreSQL control-plane metadata Encrypted disk, filesystem, cloud volume, or externally managed PostgreSQL storage
YBA Backup Encryption Exported copies of YBA control-plane state Encrypted backup destination / object storage

Final Takeaway

Encrypting the databases managed by YugabyteDB Anywhere is important, but don’t forget the database used by YugabyteDB Anywhere itself.

YBA’s PostgreSQL database contains the metadata required to manage the control plane. Protecting that data is a separate concern from enabling YugabyteDB Encryption at Rest on a universe.

Fortunately, the solution can be straightforward.

For a VM-based YBA installation, place /opt/yugabyte/data on encrypted storage. That might be an encrypted cloud volume or, as shown in the AlmaLinux 9 demo, a LUKS-encrypted Linux block device.

Then make sure the same thinking extends to YBA metadata backups.

🔐 Two Questions to Ask
There are really two data-at-rest questions when using YugabyteDB Anywhere:
1. Are the YugabyteDB universes encrypted?
2. Is the YugabyteDB Anywhere control-plane metadata encrypted?
A secure deployment should have a deliberate answer for both.

Have Fun!

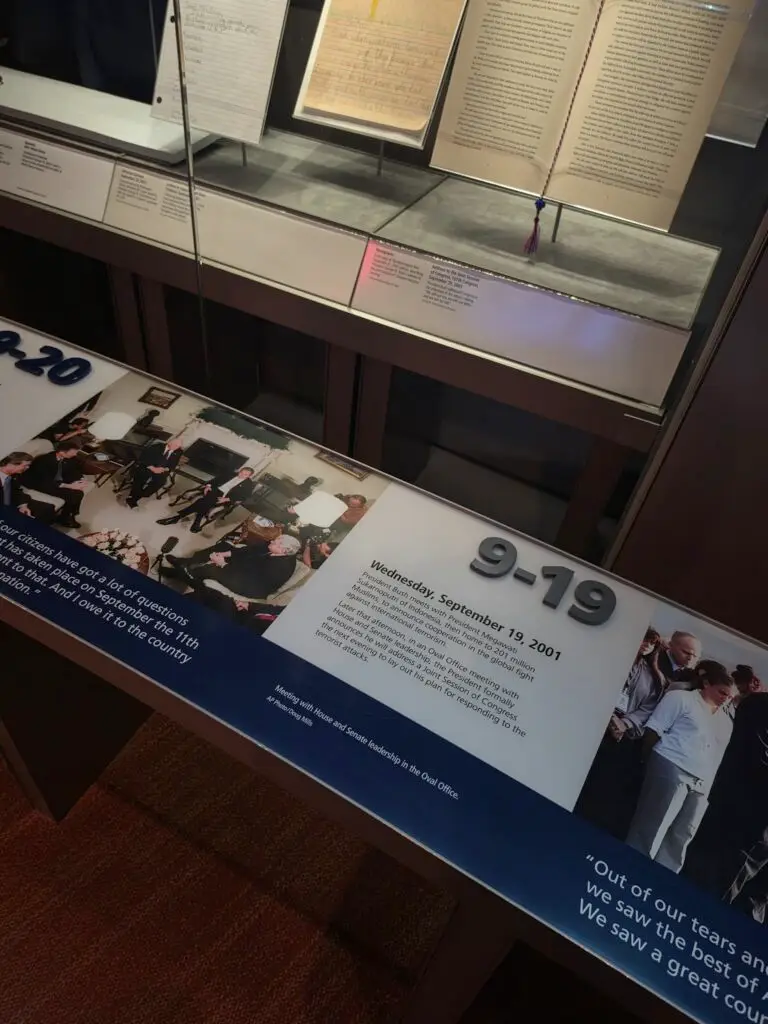
One of the most interesting exhibits at the George W. Bush Presidential Museum in Dallas is the timeline of the days following 9/11.

I had to stop when I reached September 19, 2001… my birthday. It was fascinating to read what was happening inside the Bush administration that day, during such an extraordinary and difficult week in our country’s history.

A small personal connection to a moment in history I’ll always remember. 🇺🇸